Crawlspace Before Encapsulation
Here is what the crawlspace looked like before. It is very dark and not very inviting. It also does not have any kind of crawlspace liner or vapor barrier.

Muddy Crawlspace Floor
Another area in the crawlspace before any work was done. This was taken when our service design specialist initially went to the home. Towards the right hand side of the picture, the ground there is very wet, almost like mud at this point.

Old Sump Pump
Here is the sump pump that was installed in the home before we were called. Since this sump pump was in good working condition, the homeowner decided not to have one of our sump pumps installed. When the crew installed the CleanSpace, they treated this pump just like it was one of ours. The problem with this sump pump is that it wasn't sealed nearly as well as ours are.

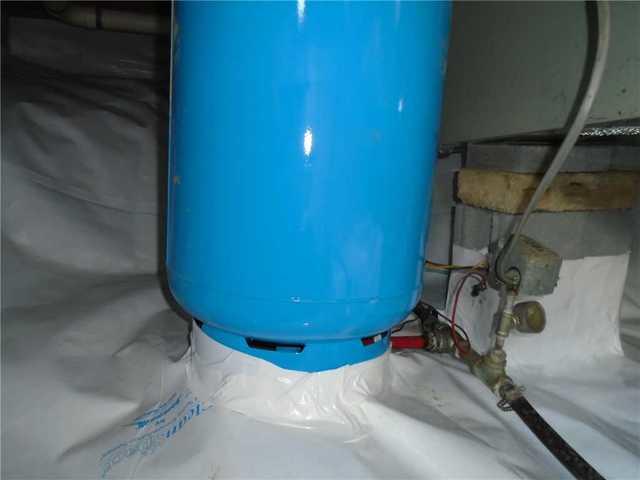
CleanSpace Liner Wrapped Tight
Here is the installed CleanSpace, you can see just how well our crew seals around obstacles. Even small areas like this, they treat with care, because if the areas aren't sealed properly it can affect the humidity throughout the whole crawlspace.

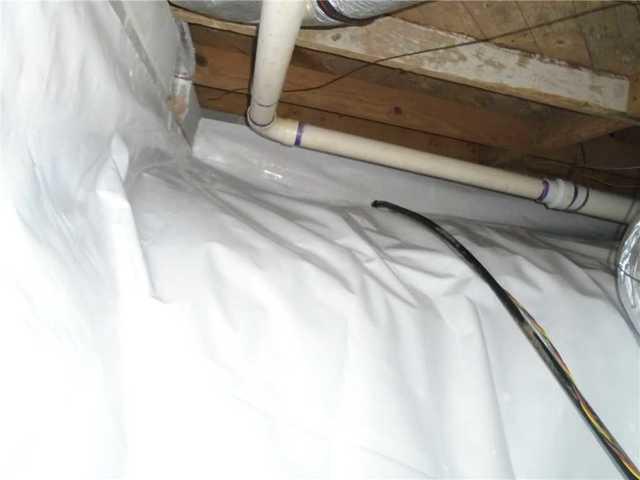
Installed CleanSpace in Crawlspace
Here is the installed CleanSpace liner, sealed properly. As you can see, the liner is pulled tight around the walls and floor, which helps to prevent any rips or tears, and won't pull down when it is stepped or crawled on.

Old Sump Pump with CleanSpace Liner
Here is the installed CleanSpace liner around the old sump pump that was shown in an earlier picture. It is not completely finished, as the CleanSpace still needs to be sealed around the sump pump. You can also see what I mentioned early about the sump pump lid being a little more open than the sump pumps that we install here.

