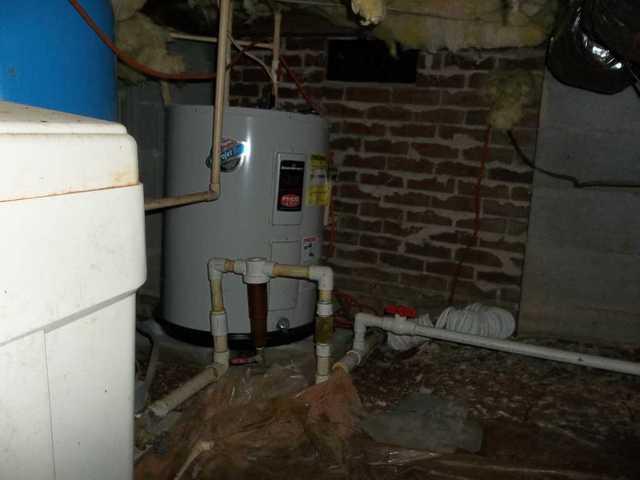
The "Before" Photo
Here is what the crawlspace looked like before the CleanSpace Liner was installed. While not the hardest area to install CleanSpace, the tight area around the water heater, paired with the pipes in the surrounding area made this area pretty tough to lay the CleanSpace liner down.

Old Crawlspace Liner
This homeowner had previously laid out a crawlspace liner, however, because of several factors this liner obviously was not doing the job. One of the main issues with these liners is the thickness of them, or rather thinness of them. Another issue that generally comes with putting in these liners is that they are not sealed correctly. If the liner does not cover the entire floor and is not properly sealed then moisture can still get into the crawlspace and cause issues.

Another View of Unencapsulated Crawlspace
Here is another photo that shows the condition of the crawlspace before we were able to install our CleanSpace liner. Again, you can see the old liner that the homeowner had put down, however the best this will do for you is to keep your pants from getting muddy. Fortunately for this homeowner, the problem was not too bad, so the CleanSpace liner was all that they needed installed!

Last View of the Unencapsulated Crawlspace
Say goodbye to the unencapsulated crawlspace! And hello to the new and improved crawlspace with CleanSpace liner! This photo is similar to the last one, where you can see the old liner that wasn't providing enough protection for the crawlspace, by letting water vapor in.

Encapsulated Crawlspace Using CleanSpace Liner
Here is the first view of the encapsulated crawlspace. As you can see, this liner seems (and is) much stronger, thicker, and more robust than a normal liner that you could buy at a home improvement store. This is because it is. Our CleanSpace liner is much thicker than your average liner.

Another View of Encapsulated Crawlspace
Here is another angle of the installed CleanSpace. This shows the entrance to the crawlspace, which is the same area that was in one of the earlier photos. If you switch back and forth between the two, you can see just how much the CleanSpace has done in way of transforming the crawlspace.

Just Need to be Sealed
This photo shows that the job is almost completed! All of the CleanSpace has been laid out, and cut around the supports of the home, so now the only thing left to do is to tape up all of the seams and make sure that the entire crawlspace has been sealed, so that no water or water vapor can get into the crawlspace.

The "After" Photo
Here is the same area that was shown in the first picture, in the area where the water heater was. As you can see, our crew navigated the area expertly and was able to go around the obstacles. Again, the last step of this process is for the crew to go back through the crawlspace and make sure that the seams throughout the crawlspace are fastened and sealed!
